My Embroidery Kit!
Like any good crafter, I started out my free inquiry project by doing a lot of Pinterest surfing. There, I found “starter kits” that listed everything you might need to begin embroidery. There were also a lot of really awesome free patterns to try, a few of which I’m sure you’ll all get to see me attempt over the course of this semester. Pinterest also gave me a bunch of tips on what stitches were most vital for a complete beginner to learn. There are so many tutorials and explanations on there that I felt like I already knew what I was doing. The online resources took me through some of the common tips and tricks, as well as what mistakes to avoid the first time around. After my deep dive into Pinterest, I was feeling pretty prepared to start embroidery.
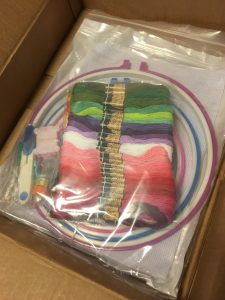
I used amazon to scope out the best embroidery kit, and bought one for only $21. I was pretty excited when it came, and opened it up right away. Inside, there were five plastic embroidery hoops, fifty colours of embroidery floss, some needles, a stitch ripper, some tools to help thread the needle, some precision scissors, and one large piece of fabric. Finally, I was ready to get started!
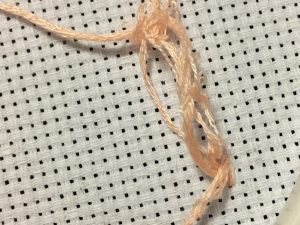
The mess that I created after only three stitches
Almost immediately, I struggled. I seriously did not anticipate how long it would take me to set up the embroidery hoop with the fabric. Twenty minutes later I finally had the hoop set up and was ready to get to it. I put needle to fabric and failed almost immediately. I have no idea what happened, but the back of my embroidery was the biggest mess I have ever seen in my life, and that was after only three stitches. I had to cut the embroidery floss to separate it from my fabric–it gave me some serious flashbacks to getting a hairbrush stuck in my hair when I was twelve.
Did I give up? Absolutely not (although maybe I should have). I started
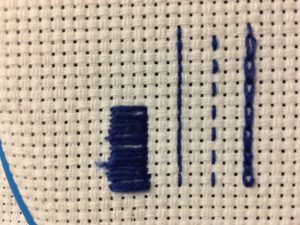
My more successful practice
trying some of the stitches that my Pinterest research had told me were essential. My first attempt was at a straight stitch, or a running stitch, which went relatively well. I moved on to try backstitch, chain stitch, and satin stitch, all of which were successful.
My main motivation for teaching myself to do this is calligraphy. I
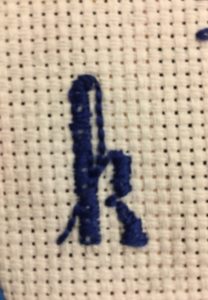
Calligraphy!
love fancy writing and wanted to try another medium with which to experiment. So of course, I had to try out some lettering using embroidery. I used backstitch to trace the outline of the letter ‘k’, and then used satin stitch to fill in the thicker lines. As you might be able to tell, my satin stitch is not perfect yet. The spots of white showing through the blue are the result of wide and inexperienced stitches in
combination with a really firm fabric that made it difficult to control exact placements of the needle. I found out later that this fabric was not actually meant for embroidery, but for cross stitch. That realization is, however, a topic for a later blog post.
Here’s the link to my Pinterest board. It has all the resources I’ve used to help me get started.
Leave a Reply